
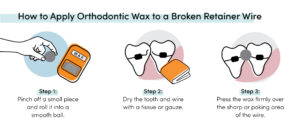
Broken Permanent Retainer: Is It a Dental Emergency?
While a broken bonded retainer is rarely a medical emergency, you should make a dental appointment to prevent discomfort and tooth movement. Most dentists can usually solve the problem with a simple bonding fix.
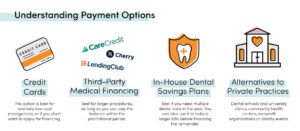
Emergency Dentist Cost Without Insurance: Prices and Affordable Solutions
The first step in relieving acute tooth pain is an emergency dental exam. Without insurance, this typically costs $100-$300 dollars.
That appointment will allow for immediate pain management. If needed, you and the dental team can plan for additional treatment and discuss ways to break up the cost over time.
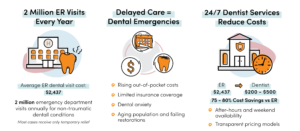
Rising Dental Emergencies Fuel Growth in After-Hours and Weekend Dentist Services
According to the American Dental Association, about 2 million people visit emergency departments each year for non-traumatic dental conditions. At first glance, a trip to the emergency room for a tooth problem might seem excessive, but many people simply don’t have other immediate options when severe dental pain hits.